Home Window Trick

0 2732

As we know YouTube is the video hub on web where we can stream video online, but the main problem is if we want to download that video in out local file system and after doing so much effort if we download that video what format it have(Generally All the video on YouTube have .flv and .mp4 format) what if we don’t have a compatible video format player.
All solutions to this question is one iSkysoft iTube Studio For Mac & Windows, where you can download video any time with no effort and convert it in any supported format whether for iPhone, iPad , other mobile or desktop.
This not only for YouTube you can use this tool for vimeo and all other online video service website, a smart download button will appear on the video from where you can download your favorite video, Also you can download all video from a specific Chanel,play-list or category with one go.
You can convert that video in any specific format for e.g. iPhone,iPad,Android and so on… , or you can activate download and convert mode by which when you download any video it automatically converted to specific format.

Key Features

  • Easy Online Video Downloader and Converter 
  • Convert Video To any Format for e.g. iPhone, iPad, Android etc..
  • Download all video from a Chanel, playlist with one go.
  • Directly convert YouTube video to specific format.
  • Inbuilt Online Video Browser.
  • Automatic integration with supported browsers.
You can use this tool by following these simple steps…


Step 1. First download the tool from above link & install it. its available for both Mac and Windows so download it according to your requirement…


Step 2. After successful installation, it will automatically install its plugin to all supported browser for e.g. chrome, Firefox, Safari and etc …

Note: When you first time run the application it will ask for your permission to integrate the plugin to all browser, Press OK for that.
Step 3. Now You have two option to download the video
  1. By paste url by clicking in top left “Paste URL”
  2. By click “Download” button near to video area

Step 4. To convert downloaded video automatically in a specific format you have to enable “Download then Convert” option

* This option is available for Full Version not in trail version.

Step 5. All Done, Have fun with all your favorite videos on your local file system with supported format.

For More Details : http://www.iskysoft.com/itube-studio-mac.html

0 2547

Bitlocker
Bitlocker

Window 7 have an incredible inbuilt tool “Bit locker” which is very useful in protecting our drives from other’s, and also its encrypt the data within the drive so if our hard disk is going to crash, still our data will be safe in the Bit locker enabled drive’s.

I myself use bit locker on my laptop and copy all my important data into the bit locker. One day suddenly my laptop’s hard disk crashed due to windows boot failure and I was not able to reinstall another window, so I used the portable Hard disk case in my PC, What I saw was all the drives were corrupt and I was unable to open them, but only the drive which was Bit locker enabled was safe. I unlocked the drive and got all my important data.

From that day I use bit locker on all my drives except BOOT drive (in which Window is Installed); because during boot time if the drive is locked then we will be unable to boot and the request for the key to unlock the “Boot Drive” without start up window.

bitlocker

 As shown in the above picture, Drive D is encrypted by “bitlocker” , if you want to unlock it you have to enter password or a key which is generated at the time of bitlocker configuration on this drive.
Bitlocker

After unlock , one can access your data which is permanently safe in this encrypted drive.:)

Bitlocker
Now I will tell you how you can make your drives, protected by using Bitlocker:
Step 1: Open My Computer (or Press Window + E Key) 
Step 2: Now Right Click on the drive, in which you want to enable bitlocker.
Step 3: Click on “Turn on BitLocker” as shown in the picture given below:
Bitlocker

Step 4: Now it will ask you the way you want to unclock this drive :

Bitlocker
I would suggest you to use , Password option , just check “Use a password to unlock the drive” and click Next.

Step 5: After that , you have to save a recovery key with various option:
Bitlocker
Save Recovery Key to a File , with 2nd option in computer and latter on save it on cloud or another safe place where you can get it easily later on.
Bitlocker
Step 6: Click on “Yes” , then Next,and then system ask you  “Are you ready to encrypt this drive?” Now click on “Start Encrypting” to start setup .

Step 7: Now a window appear as such:

Bitlocker
Click on the close , it will be still working in background , it takes lots of time depending upon the size of your drive , when its 100% completed then ,the bitlocker drive encryption is done and your files are now safe.

As we know Microsoft , previously launches Window 8 Developer/Consumer Preview (Demo version) to test and get the feedback from the user.They modify window 8 according to user need and reliability.Now They will plan to launch Window 8 in the month of September or October.
Before launch the full window 8 Setup they want to know feedback of window, which they are going to launch So, Microsoft on Thursday(31/May/12) releases the Window 8 Final test version with refinement and improvement . You Can Download Window 8 release Preview Here(Download) or can see the official Microsoft Window 8 Release preview HERE.

The main purpose to develop window 8 is to provide an unique interface. As we know sales of PC and OS decreases day by day due to smart phones & tablets. So Microsoft start working on window 8 to encourage the people to use Window OS , PC and help reimaging Windows.
This Test Release preview version available in 14 different language with more improvement and refinement of its previous three month version.
*** There is also a good News for old user , if you are stopped to buy a new PC , because of the window 8 release time, Then you can buy your PC now. Microsoft will Provide the Window Upgrade Offer in 131 markets . So you can upgrade your Window 7 any version to Window 8 Pro for $14.99(U.S) from 31 Jan’13 . this program will ends on Feb’13.

As we Know, in Today Generation ,Our Data is the most important thing, So we don’t want take chance with it. Cloud Computing Give us a best way to store our Data at cloud servers by sync. it via PC, We just need to copy and paste the data file in specific folder of cloud service provider, which is automatically uploaded on server.

What is cloud Storage ?

At most basic level, a cloud storage system needs just one data server connected to the internet. A client sends copies of files over the Internet to the data server, which then saves the data. When the client wishes to retrieve the data, he or she accesses the data server through a Web-based interface pointing to that service provider. The server then either sends the files back to the client or allows the client to access and edit the files on the server itself.

Advantage ( With Cloud Storage , What can you do ? ):

    • Anywhere/anytime, we can access our data without carrying any Pen drive or hard disk.

    • Free of cost. Initial service.

    • Don’t  worry about Hard disk Crash and other failure (Data is safe on server side).
    • Access your important files anywhere in the world.
    •  Sync your files from any computer.
    • Online Edit and Save .
    •  No need to carry external hard disks.
    All we need only Internet Connection and PC.
    Google Drive Sky Drive Dropbox cloud computing
                                  2GB *       +         5GB          +           7GB**     =   14GB (Initial)
                                      
                                  8GB          +         5GB          +            25GB    =    38GB

    Various Cloud Storage Providers : 
    The top three are,

    1. GoogleDrive , 
    2. Skydrive
    3. Dropbox


    * in dropbox we can increase Free Space by referral upto 8 GB.

    ** In Sky-Drive , we can upgrade our space upto 25GB free of cost (After 3 Month from account creation) 

    => “Google Drive” As it’s launched by Google Few Days Ago , It just only Provide 5 GB Free Space . 


    Detail Overview:

    DropBox Vs/ Skydrive Vs/ Google Drive


    Drop Box, Sharing Online

    Dropbox Gives you Free space of 2GB, 8GB by referral and with subscriptions up to 100GB at $19.9 per month, available on website. To get dropbox storage, first you have to create a account, to create a fast and easy account click here


    After creating account, download Dropbox, to download dropbox click below.

    After downloading the file, run that file and  Click ‘Yes’ to accept the User Account Control settings dialog and Follow the instructions to get Dropbox set up on your computer and choose a drive to create dropbox folder. Now when you are done, open that folder and simply copy and paste your files there, they will be start syncing immediately in background process. Its Simple and easy.

    Access EverywhereGoogle Drive is launched few days ago and provided by Google itself, to get a  Google Drive  service, you must have a Gmail/Google account, Google Drive is also  a platform, where you can sync your files from your PC. Google provides you storage more than Dropbox i.e 5GB, also you can purchase upto 100GB at $4.99 per month. To go to Google drive, click here, after downloading, an installer will run and allow permission after the installer completes downloading and , now follow the instructions and choose the drive where you want to create the folder of Google Drive. Its also simple, fast and easy. Now simply just copy paste your files there and they will be synchronized to your Google drive account.


    Sky Drive cloud storage

      SkyDrive service is provided by Microsoft, Skydrive  provides you (new users) a space of 7GB, which is highest among all three, but the old users can claim their extra space i.e 25GB by login into their account in a limited time period. This is a very good service known by all. it provides you highest storage space at very affordable cost i.e 100 GB at INR 2600.00 ($48.8) per year, you can also attach your files to send your files from skydrive. To access this service, you must have a Hotmail or Windows Live account,


     To get one click here,  To download skydrive, click below.

    Download Skydrive app


    These all three providers,  provides you facility of sharing files with your friends and runs on all platforms, except Google Drive on ios (soon run).
     

    So think Smartly and start Securing Your Data by, Choose your Service smartly and manage your space online with the new technology Cloud Storage.


    If you have any questions, Please leave your questions below.

    0 2544

    GTalk (Google Talk) is a great IM(Instant Messaging) chat  application by Google.

    As there is an option to show status as “Show Current Music Track”, it will Ok when songs are played on Win-amp, But when we play tracks on Window Media Player, Gtalk Doesn’t show the Current Track Played as Status.
    Are you facing same problem to show current music track as status on Gtalk, when tracks are played on Window Media Player.

    Its because there is no Google Talk Music Plugin for Window Media Player in Window 7

    Here I have an solution for that , Follow these steps to see your status as “Current Music Track Name”
    1.  Uninstall Your Galtk and also Gtalk Plugin from your PC.

    2. Its Ohk! if you already have Gtalk setup or you can download it from . Download Gtalk
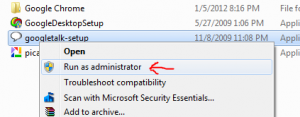
    3. Now Right click on downloaded file (googletalk-setup.exe) and Click on “Run as administrator”
    4. Now Follow instruction to install Google talk.
    5. After installation , Sign In and set the status as “Show Current Music Track ” .
    6. Now play track on Window Media Player and see the Track Name As Gtalk Status.
    Still Have Issue ???????

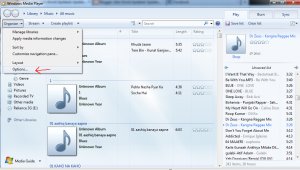
    • Open Window Media Player

    • Now Go to : Organize >> Option As shown in the picture .

    • An New Window appear  Click On “Plug-ins” >> “Background” options
    • Now you can see Gtalk Plugin , Check the Gtalt Plugin on the right Side .

         >> Apply it and press OK ! Now your Gtalk starts show current Music track as status

    0 2634

     ===> Customize Fence Manually <===

    In my previous article I explained how to configure Fence for first time use by recommend setting .

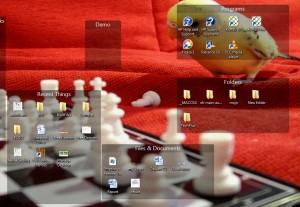
    Manage You Desktop View With An Unique Way- Clean Up Your Desktop Clutter

    Now in this post I explain how to manage Fence (Create New Fence , Delete Fence, Rename)

    How to Create New Fence.

    Step 1 . By Using right mouse button to create new fence. On your desktop , press the right mouse button , Draw any shape rectangle , and release the mouse.

    Step 2. When you release the right mouse button, then “Create new Fence here” option appear , Click on it .

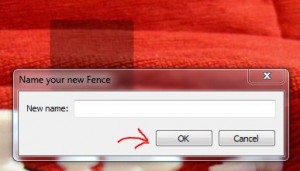
    Step 3. Now Enter New name of fence (e.g. Demo ) in appear window.

    Step 4. Now your New Fence is created , Now Drag and Drop files (Folder, Shortcuts etc) from desktop to fence.

    Note:- When fence is fully field with files then it arrange all the file with Scroll Slider (Visible when hover on the fence)  

    Now How to delete Fence .

    • Right click on the fence , then an delete fence option appear , click on it and confirm to delete fence.

      Deleting Fence not means it delete your files also (Your file automatically arranged on the desktop)

    Now How to Rename Fence.

    • Right click on the fence , then an rename fence option appear , click on it to rename the fence.
    • Enter the new name and save it .

    If you are facing any problem with this you can also view

    *** If you want to make desktop blank then Click Left Click 2 Times on desktop , Now All the fence will be invisible .

    If you want to view all the content of desktop Click Left Click 2 Times Again.

    0 2509

    ===> Optimize Desktop View <===
    Are you facing problem to manage your content on desktop , So here is the one optimized solution for the same , Your can Use this utility to manage the all type of shortcuts , file, folder etc .

    You can Download the Fence  From here .

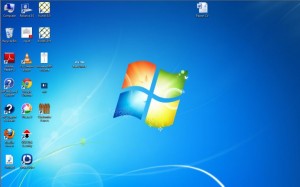
    Pre-install snapshot of  my desktop

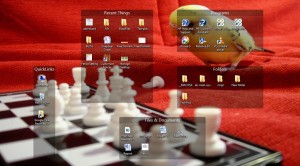
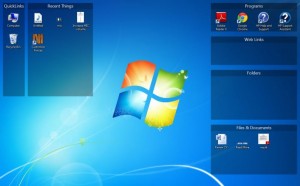
    After installation of Fence Snapshot (Desktop View)

    Now how to use it , Please follow these step to configure Fence .

    Step 1 . After Download , Install it in your PC .

    Step 2. Now run the “Customize Fence” from the desktop.

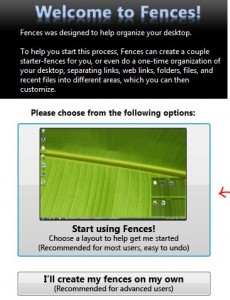
    Step 3.Now an window open when you first time open Fence , Click on Recommend Setting as shown in the picture.

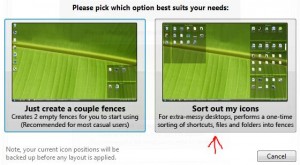
    Step 4. Now you have two option , from which select 2nd option ( For Automatically Sorting ) as shown in picture.

    Step 5. Now you got an message for successful configure Fence. close it and see your desktop with different look .

    Every Thing Customized Now 🙂

    You can also refer my another post for the same ,

    *** If you want to make desktop blank then Click Left Click 2 Times on desktop , Now All the fence will be invisible .

    If you want to view all the content of desktop Click Left Click 2 Times Again.

    0 2209

    ===>> Setup MIC Volume Problem <<==

    In our system we generally face the MIC problem while communicating through social media’s (Gtalk,Yahoo!, FB, Skype etc) .

    This unexpected behavior is generally because of default MIC setting, By Default in Window 7 Mic automatic change its sound level according to other active sound. Means sound level’s is not fixed for Window 7 MIC setting . Its also change accordingly your network speed .

    Now here I’ll tell you how to fix this problem.
    Step 1. Are you able to see the speaker logo in the right of your screen ???
    Step 2. Right click! on the speaker icon and click on “Playback Devices ” option.
    Step 3. Now a new window appear , select the recording option. 

    Step 4. Now double click on “Microphone”. After click a new window appear, select “Levels” marked RED

    Step 5. Now increase the “Microphone” to 100 . After “Apply” click on OK!

    Step 6. Now come back to first window and go to “Communication” option and choose “Do Nothing” option and apply it and click on OK!

    Step 7. Its Done! 🙂

    =>> Recover Deleted Data <<=
    As we use many removal device to store our data like “Pen Drive, Hard Disk, ” .
    Sometime it’s corrupted due to failure or accidentally we delete the important data from removal device, then we have to face many problem due to the data lose.
    This data is difficult to recover.
    Here I will Discuss about the Toll By Which U can Easily Recover Your Data From Memory Card, Pen Drive, Hard Disk etc…
    Step 2. After Download, Install it and Launch the software. Press “Next”
    Step 3. Now Choose the File Format which you want to recover for e.g. Image,Song,Document etc .
    Step 4. After Choosing file format, You can choose various option for location where you stored your file.
    For e.g. If the Data is Deleted or corrupted from Pen Drive then you have to choose Pen Drive Location, Then Click on “Next”
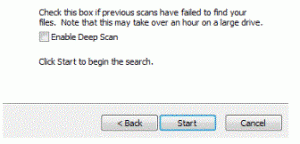
    Step 5. Now Select “Enable Deep Scan” Option and Click on “Start”.

    Step 6. Then, This Tool process for file searching, and after some time it show the deleted file.

    Step 7. Now It show many deleted file , You have to choose the file which you want to recover , After selecting Click on “Recover”.

    Step 8. Now give the path where you want to restore file.

    Step 9. Its Done 🙂 ! If you face problem then see the Demonstration example given below.

    Demonstration :-

    Lets take an example , I have a folder “Data123” in which i store my picture, accidentally i deleted the folder name as “Data123” From My “C:/temp” Drive now see the step how i recover my Data123 Folder “Picture’s”.

    Now My data is in image format so i choose picture,
    Now My Picture was stored in C://temp/Data123 so i chose the folder path, From “In a specific option”,
    Now After Choosing the Path Click “Next” and after this
    Check the “Enable Deep Scan” Option and then click on “Start” For Start the recovering of Data.
     
    Now , it take some time for the processing to search deleted file.
    After Processing, you have to choose files which you want to recover back, Select File by checking it and click on “Recover”.
    After this you have to give the path where u want to store the recover file. Like “here i recover files on the same folder”.
    My 4 file which i click for recover was succesfully recoverd on the same folder.

    Now Its Your Time To Get Back Your Data 🙂

    Share This ! Because Sharing is Caring

    0 2307

    When we want to reset our IE-Internet Explorer we are facing many problem.
    Here i will tell you how to Reset IE-Internet Explorer directly by a command .

    Follow some simple step to reset IE-Internet Explorer easily:
     
    Step 1. Open “Start” by clcking on window logo ( on left bottom side) 
    and type “inetcpl.cpl”. 
    Step 2. You find an option an inetcpl.cpl file , open it:
     

    Step 3: Now , you get the IE-Option window directly ! Goto ” Advance Option ” and click on “Reset”  for reset the IE fully !
    Step 4 : Now check the ” Delete Personal Setting ” and click “Reset”.
    Step 5: Its Done! Hope it will help you 🙂
    Share It , Sharing is caring !

    STAY CONNECTED